Lens Based Collage

Digital Collage
November 2023
November 2023
This digital collage was a practice using the digital software Photopea and their tools. I used a total of 10 photos, 5 of them landscapes and 5 people focused, and utilized a number of offered tools in the software like adjusting the color of imported images, erasing backgrounds, liquefying images, adjusting size, and more. I wanted to get experimental with this piece, and added on continuously to create a colorful collage.
Process
The following are the 10 photos I used in this piece:

Photo of an indoor "rain forest" taken at the Stevens Point college field trip.
|

Photo of the clouds taken in a car.
|

Photo of my neighbors house with a bright moon seen in the background.
|

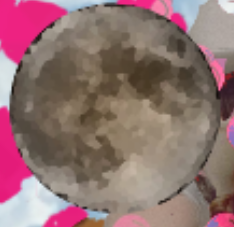
Photo of the moon.
|

Photo of the moon before my camera adjusted to the night sky, blocking it out in white.
|

Photo of my brother in motion hugging our cat.
|

Photo of me and my sister dressed up for a movie premiere.
|

Photo of my sister and brother showing hearts for the camera.
|

Photo of me under a pink light.
|

Photo of my sister on a swingset.
|

To start out, all of these photos came to be by using the erasing tool initially. There were 3 versions of the eraser, the regular eraser tool, the background eraser, and the magic eraser. Typically, I would begin the process with using the magic eraser to take away the most area
as quick as possible. Though, there were some downsides to the tool. Often times, it would take away too much area and the computer wouldn't be able to differentiate the lines between the photo and
what to erase, so I would touch up the image with the other erasing tools.

The erasing tool was especially helpful in these small areas of the photographs like the leaves on the trees on one of the photos. By zooming in and using a small sized eraser, I was able to give images more depth my erasing even the smallest areas of background in between the plants.

|

Erasing images was a continuous process and not just tied to the start, but after the initial erasing I would then use CTRL + C to copy the PNGs and open them onto my main, blank canvas. This was actually the most challenging part for me I believe, as I wasn't exactly sure how to formulate my ideas with prior photos of us. The blank canvas meant there were so many possibilities to try when creating and this is reflected with my canvas board. Throughout creating the canvas constantly changes sizes as my ideas changed with it. |

As stated before, I really wanted this to be a more creative, abstract piece, so I wasn't concerned with keeping things completely realistic. In fact, I really love thinking of how these pictures started and how I was able to warp them in the program. One of the best examples of this is the clouds. Again, this was the original image:


|


|
And here, I use the kaleidoscope tool to warp the clouds into a shape nearly unrecognizable from the original shape. While in the final product this design of the clouds was lost in the background, I still had a lot of fun creating the image. Another example of this is the white moon image, where it starts like this, and ends as an array of colors and cool hues.

|

|
|
Another tool I experimented with was the distortion tool. I liked to used these the most I feel because I think they were the most fun to use. Here, I use the pixel tool to use the crystallize function to edit the image. I really liked the texture this left on the image and how my small hair strands became brown dots across the page. I also used this tool for the moon, crystallizing the image. For later projects, I think this is the tool I'm most excited to use again. |

|

|

Another aspect of the program I used a lot was the coloring tools. I used these a number of times across the piece to distort the lens and color code the image more. With this image of my siblings, I used the Hue and Saturation tool to give the image a more pink tone like the rest of the image. Another instance I used a color tool in this design was with the image of my sister swinging, giving the image a purple tint to not only contrast with the green trees behind her but also to give the image a little bit of consistency with color.

|

|

A final tool I utilized was the pinch tool. I used this tool on the photo of my brother and cat. This tool became particularly useful when I was running out of space on the board and needed room. Using this tool not only stylized my image further but also provided more space of work when needed. Using this tool taught me that I should make use of space of edited images not just through simply sizing the image up and down, but also shifting it and distorting it in ways that magnify the art more.
Reflection

All in all, I enjoyed this project and practice. It was very important to understand, grasp, and utilize during this course, and playing around with the different options was genuinely interesting to try and understand. I liked distorting images, layering factors, changing the hues to make the pictures pop with color more, and creating a stylistic, fun, final image.
